How to Set Up a VPN on Windows: Step-by-Step Guide for Beginners
Learning how to set up a VPN on Windows is one of the simplest ways to improve your online privacy, especially on home and public Wi-Fi networks. You do not need to be a tech expert; with a few careful steps, you can get a secure connection running in minutes.
This guide walks you through what a VPN is, how it works on Windows, and several ways to configure it using built-in tools and VPN apps. You will also see common mistakes to avoid and practical tips to keep your connection both safe and fast.
Choosing the right VPN before you install it on Windows
Understand what a VPN can and cannot do
A Virtual Private Network (VPN) creates an encrypted tunnel between your Windows device and a VPN server. Your internet traffic passes through this tunnel, making it harder for local observers, like your ISP or people on public Wi-Fi, to see what you are doing online.
However, a VPN does not make you completely anonymous, and it does not protect you from everything. For example, websites can still track you using cookies, accounts, and fingerprinting techniques. Malware, phishing sites, and unsafe downloads remain a risk even with a VPN enabled.
Key features to look for in a Windows VPN
Before you start learning how to set up a VPN on Windows, choose a service that fits your needs. Consider:
- Strong encryption: Look for modern protocols such as WireGuard, OpenVPN, or IKEv2 with strong ciphers.
- No-logs policy: Prefer providers that clearly state they do not log your activity and have a transparent privacy policy.
- Kill switch: This feature cuts your internet connection if the VPN drops, reducing the risk of exposing your real IP address.
- Windows app quality: A well-designed Windows app with clear settings is easier and safer for beginners.
- Speed and server locations: More servers and nearby locations usually mean better performance.
- Customer support and guides: Helpful documentation and live chat can save time when you run into issues.
Free vs paid VPNs on Windows
Free VPNs may look attractive, but they often come with limitations and privacy trade-offs:
- Data caps and limited speeds
- Fewer server locations and crowded servers
- Questionable logging or advertising practices
Paid VPNs generally offer better security, clearer privacy policies, and more reliable apps. If privacy is important to you, a reputable paid provider is usually the safer choice.
How to set up a VPN on Windows using built-in settings
When to use Windows built-in VPN client
Windows 10 and Windows 11 include a built-in VPN client that lets you connect to VPN servers using protocols like IKEv2, L2TP/IPsec, and SSTP. This option is useful when:
- Your workplace provides VPN server details but no dedicated app.
- You are connecting to a self-hosted VPN server (for example, on a router or cloud server).
- You prefer not to install extra software.
Step-by-step: Adding a VPN connection in Windows
To configure a VPN manually in Windows, you need connection details from your VPN provider or network admin: server address, VPN type, username, password, and possibly a pre-shared key or certificate.
Then follow these steps (Windows 10 and 11 are very similar):
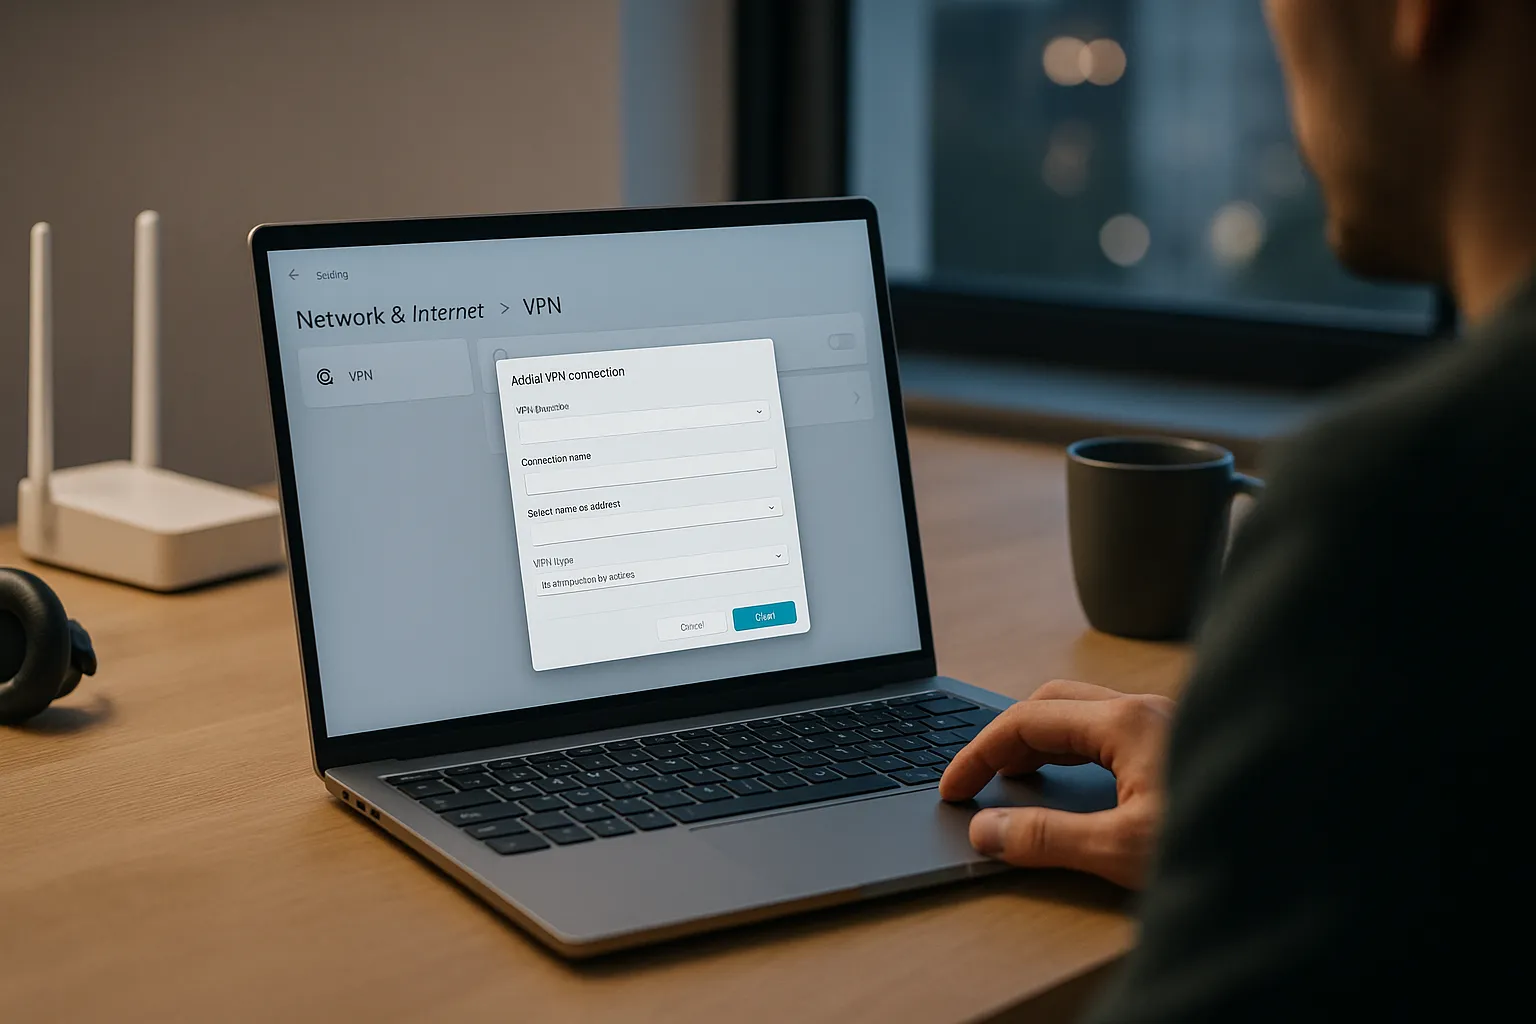
- Open Settings > Network & Internet > VPN.
- Click Add a VPN connection.
- For VPN provider, choose Windows (built-in).
- Enter a Connection name (any label you like).
- Enter the Server name or address provided by your VPN service or admin.
- Select the correct VPN type (for example, IKEv2 or L2TP/IPsec).
- Under Type of sign-in info, choose how you authenticate (username and password, smart card, or certificate).
- Enter your username and password if required.
- Click Save.
To connect, go back to Settings > Network & Internet > VPN, select your new connection, and click Connect. You can also use the network icon in the taskbar to connect or disconnect quickly.
Security and privacy considerations with manual setup
When you set up a VPN manually, you are responsible for choosing secure options:
- Prefer modern protocols: Use IKEv2 or another modern protocol if available, and avoid outdated options like PPTP.
- Verify server details: Always copy server addresses and keys from trusted sources, not from random websites.
- Use strong credentials: Choose unique, strong passwords for your VPN accounts.
Manual setup gives you more control but can be less user-friendly than a dedicated app, especially when switching servers or enabling advanced features.
Setting up a VPN on Windows with a dedicated VPN app
Why most users should use a VPN app
For most people, the easiest way to learn how to set up a VPN on Windows is to use the official app from a trusted VPN provider. These apps handle complex settings automatically and provide extra features such as:
- One-click connect and quick server switching
- Kill switch and DNS leak protection
- Split tunneling to choose which apps use the VPN
- Automatic connection on startup or on unsecured Wi-Fi
Typical installation process for Windows VPN apps
While each provider is slightly different, the general steps look like this:
- Sign up for a VPN plan on the provider’s official website.
- Download the Windows app from your account dashboard or downloads page.
- Run the installer and follow the on-screen instructions.
- Launch the app and log in with your account credentials.
- Choose a server location (often your nearest city for best speed).
- Click the main Connect button.
Once connected, your Windows device will route traffic through the VPN server. Many apps show your new IP address and connection status clearly in the interface.
Optimizing performance and speed on Windows
VPNs can reduce your speed slightly because of encryption and the extra distance your data travels. To keep performance acceptable:
- Pick a server that is geographically close to you.
- Try different protocols; WireGuard or modern variants are often faster.
- Avoid overloaded servers; many apps show server load or recommend the fastest option.
- Close bandwidth-heavy apps you do not need while using the VPN.
Pros and cons of using a VPN on Windows
Main advantages of a Windows VPN
Installing a VPN on your Windows PC brings several practical benefits:
- Improved privacy on public Wi-Fi: Encrypts your traffic so people on the same network cannot easily snoop on it.
- Reduced ISP tracking: Your internet provider sees that you are connected to a VPN, but not every site you visit.
- More secure remote work: Protects company data when you access corporate resources from home or on the road.
- Bypassing some local restrictions: Helps you reach content or services blocked on certain networks, where legally allowed.
Limitations and realistic expectations
It is important to understand what a VPN cannot do:
- It does not stop all tracking; websites and apps can still collect data about you.
- It does not replace antivirus, firewalls, or safe browsing habits.
- It cannot fix insecure accounts or weak passwords.
- It may not bypass every form of geo-blocking or censorship.
Think of a VPN as one layer in your security and privacy setup, not a complete solution on its own.
Troubleshooting common Windows VPN issues
Connection fails or keeps dropping
If your VPN will not connect or disconnects frequently on Windows, try:
- Restarting your computer and router.
- Switching to another server location.
- Changing the VPN protocol in your app settings.
- Temporarily disabling third-party firewalls or security suites to test (then configure them properly).
- Running the VPN app as Administrator if permissions are an issue.
Slow speeds or high latency
Slow connections are often caused by:
- Far-away servers: switch to a closer server.
- Overloaded servers: choose a less busy location.
- ISP throttling: some VPN protocols handle throttling better than others.
- Background updates or cloud backups consuming bandwidth.
Test your speed with and without the VPN to understand the impact, and adjust your server or protocol accordingly.
DNS and IP leaks on Windows
Even with a VPN, misconfigurations can expose your real IP or DNS requests. To reduce this risk:
- Enable DNS leak protection in your VPN app if available.
- Turn on the kill switch so your traffic stops if the VPN drops.
- Use online tools to check for IP and DNS leaks while connected.
Safe VPN usage tips and final advice
Best practices for staying safe with a Windows VPN
To get the most from your VPN without relying on it for everything:
- Keep Windows, your browser, and your VPN app updated.
- Use strong, unique passwords and enable multi-factor authentication where possible.
- Be cautious with downloads, email attachments, and unknown links, even when the VPN is on.
- Regularly review your VPN settings, including auto-connect and kill switch options.
- Log out of accounts you no longer use and clear old browser data regularly.
Summary: How to set up a VPN on Windows the right way
When you know how to set up a VPN on Windows correctly, you add a valuable layer of protection to your daily online activity. Choose a reputable provider, decide whether to use the built-in Windows client or a dedicated app, and follow the setup steps carefully. Combine your VPN with sensible security habits and up-to-date software, and you will significantly improve your privacy and security without making unrealistic assumptions about complete anonymity.